Using Beaver Builder & Zapier for new post notifications
In this tutorial, I’m going to show you how you can use the Beaver Builder Subscribe module for new post notifications emailed to a subscriber list. This kind of functionality is normally reserved for plugins like Jetpack Subscribe or Postmatic, but using this technique you can build your own automation using the tools already available to you in Beaver Builder.
Step 1: Create the Subscriber form
One of the advanced modules in Beaver Builder is the Subscribe module which allows you collect subscriber names and email addresses from your website visitors. The module has loads of great built-in services like ActiveCampaign, Mailchimp and more and is really useful in allowing you to create lists using these various services. However, none of these services is able to detect when you hit the publish button, so whilst they are great for weekly or monthly campaigns, they’re not so good for new post notifications.

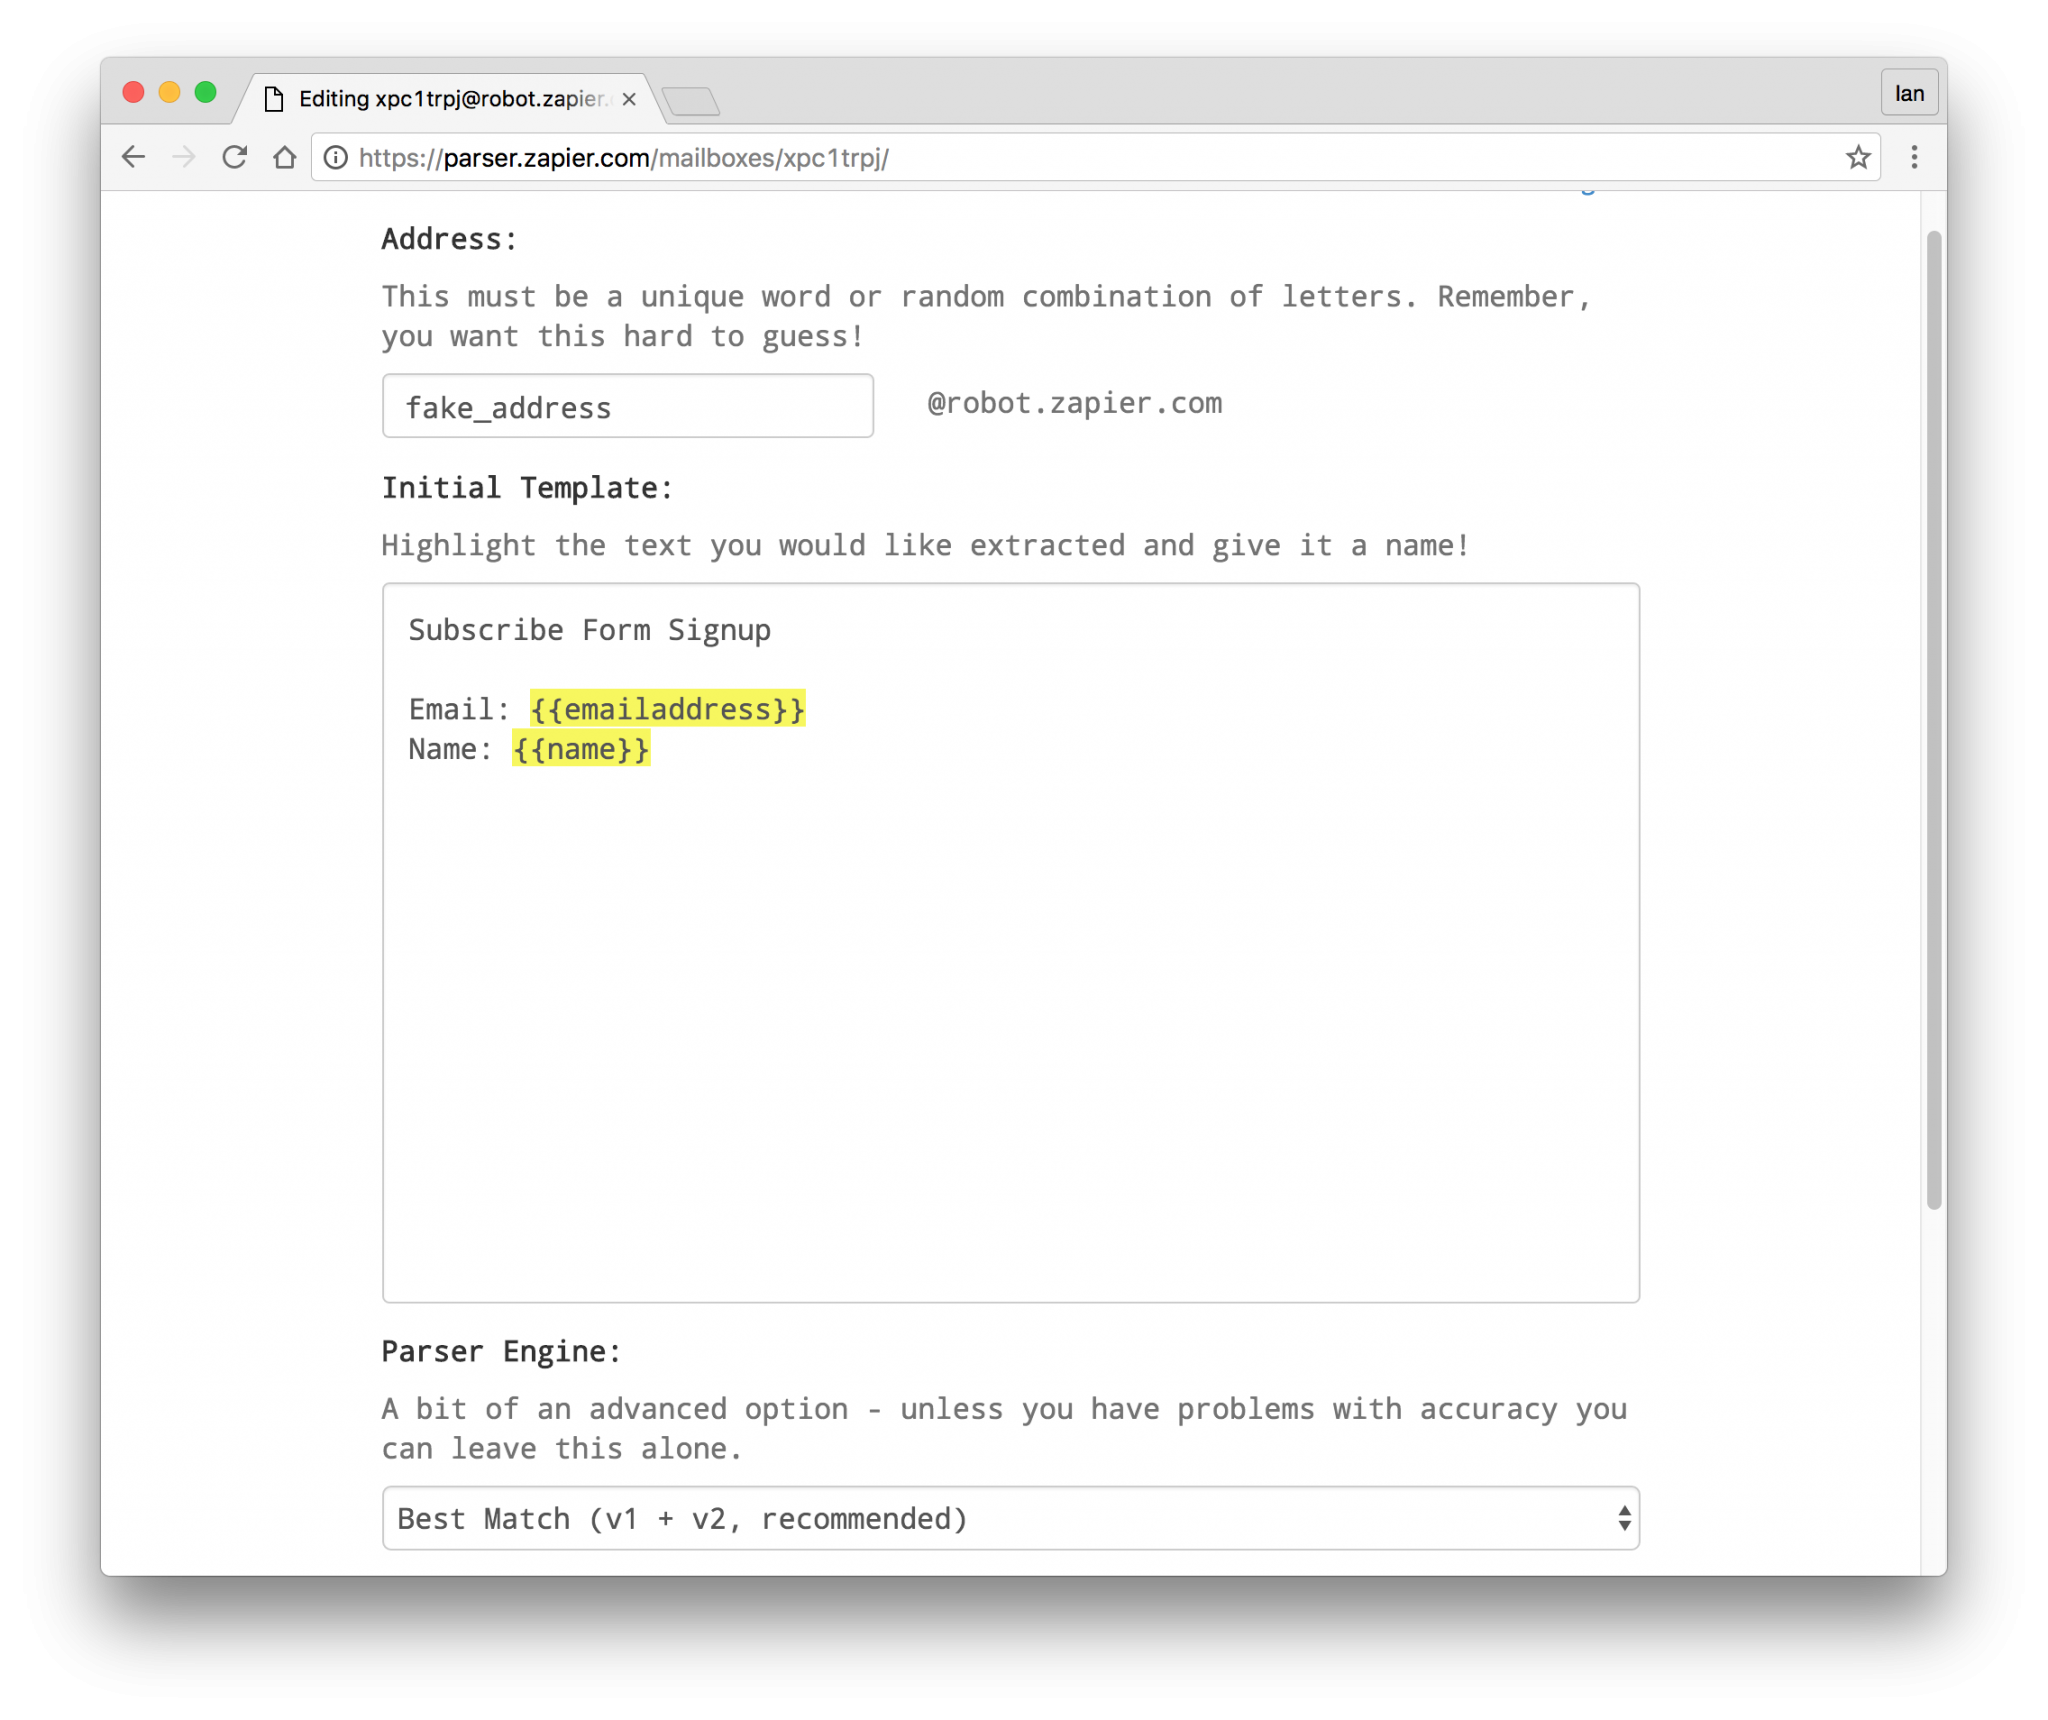
Within the Beaver Builder ‘Subscribe’ module is an email option that allows you to send an email to a specified address containing the contents of the form. So if you’re collecting names and email addresses, you can get the module to send an email with the following information:
Subscribe Form Signup
Email: {{emailaddress}}
Name: {{name}}
This information is then used in step 2 by the Zapier Email Parser. Using this technique means you don’t need to install any Zapier plugins on your website for new post notifications.
Step 2: Using the Zapier email parser
Zapier is a powerful online app that allows you to tie up multiple online services. What I like about Zapier is its ability to write out multiple steps in its interface allowing you to create quite powerful waterfall actions from a single trigger.
Zapier also has a really simple and free email parser which again, gives you a way of picking out information from emails you send it. Head over to parser.zapier.com and set up an account to create your first parser. You get an email address that you can customise and then use within the Beaver Builder Subscribe module to send your emails. Zapier saves this as an app option in its main interface to allow you to use out the information to build your subscriber list database.
Step 3: Storing values in Zapier
In Zapier, we can create a new Zap that triggers when the parser receives an email, pushes the value onto a list using Zapier Storage and sends out a confirmation email to your new recipient.
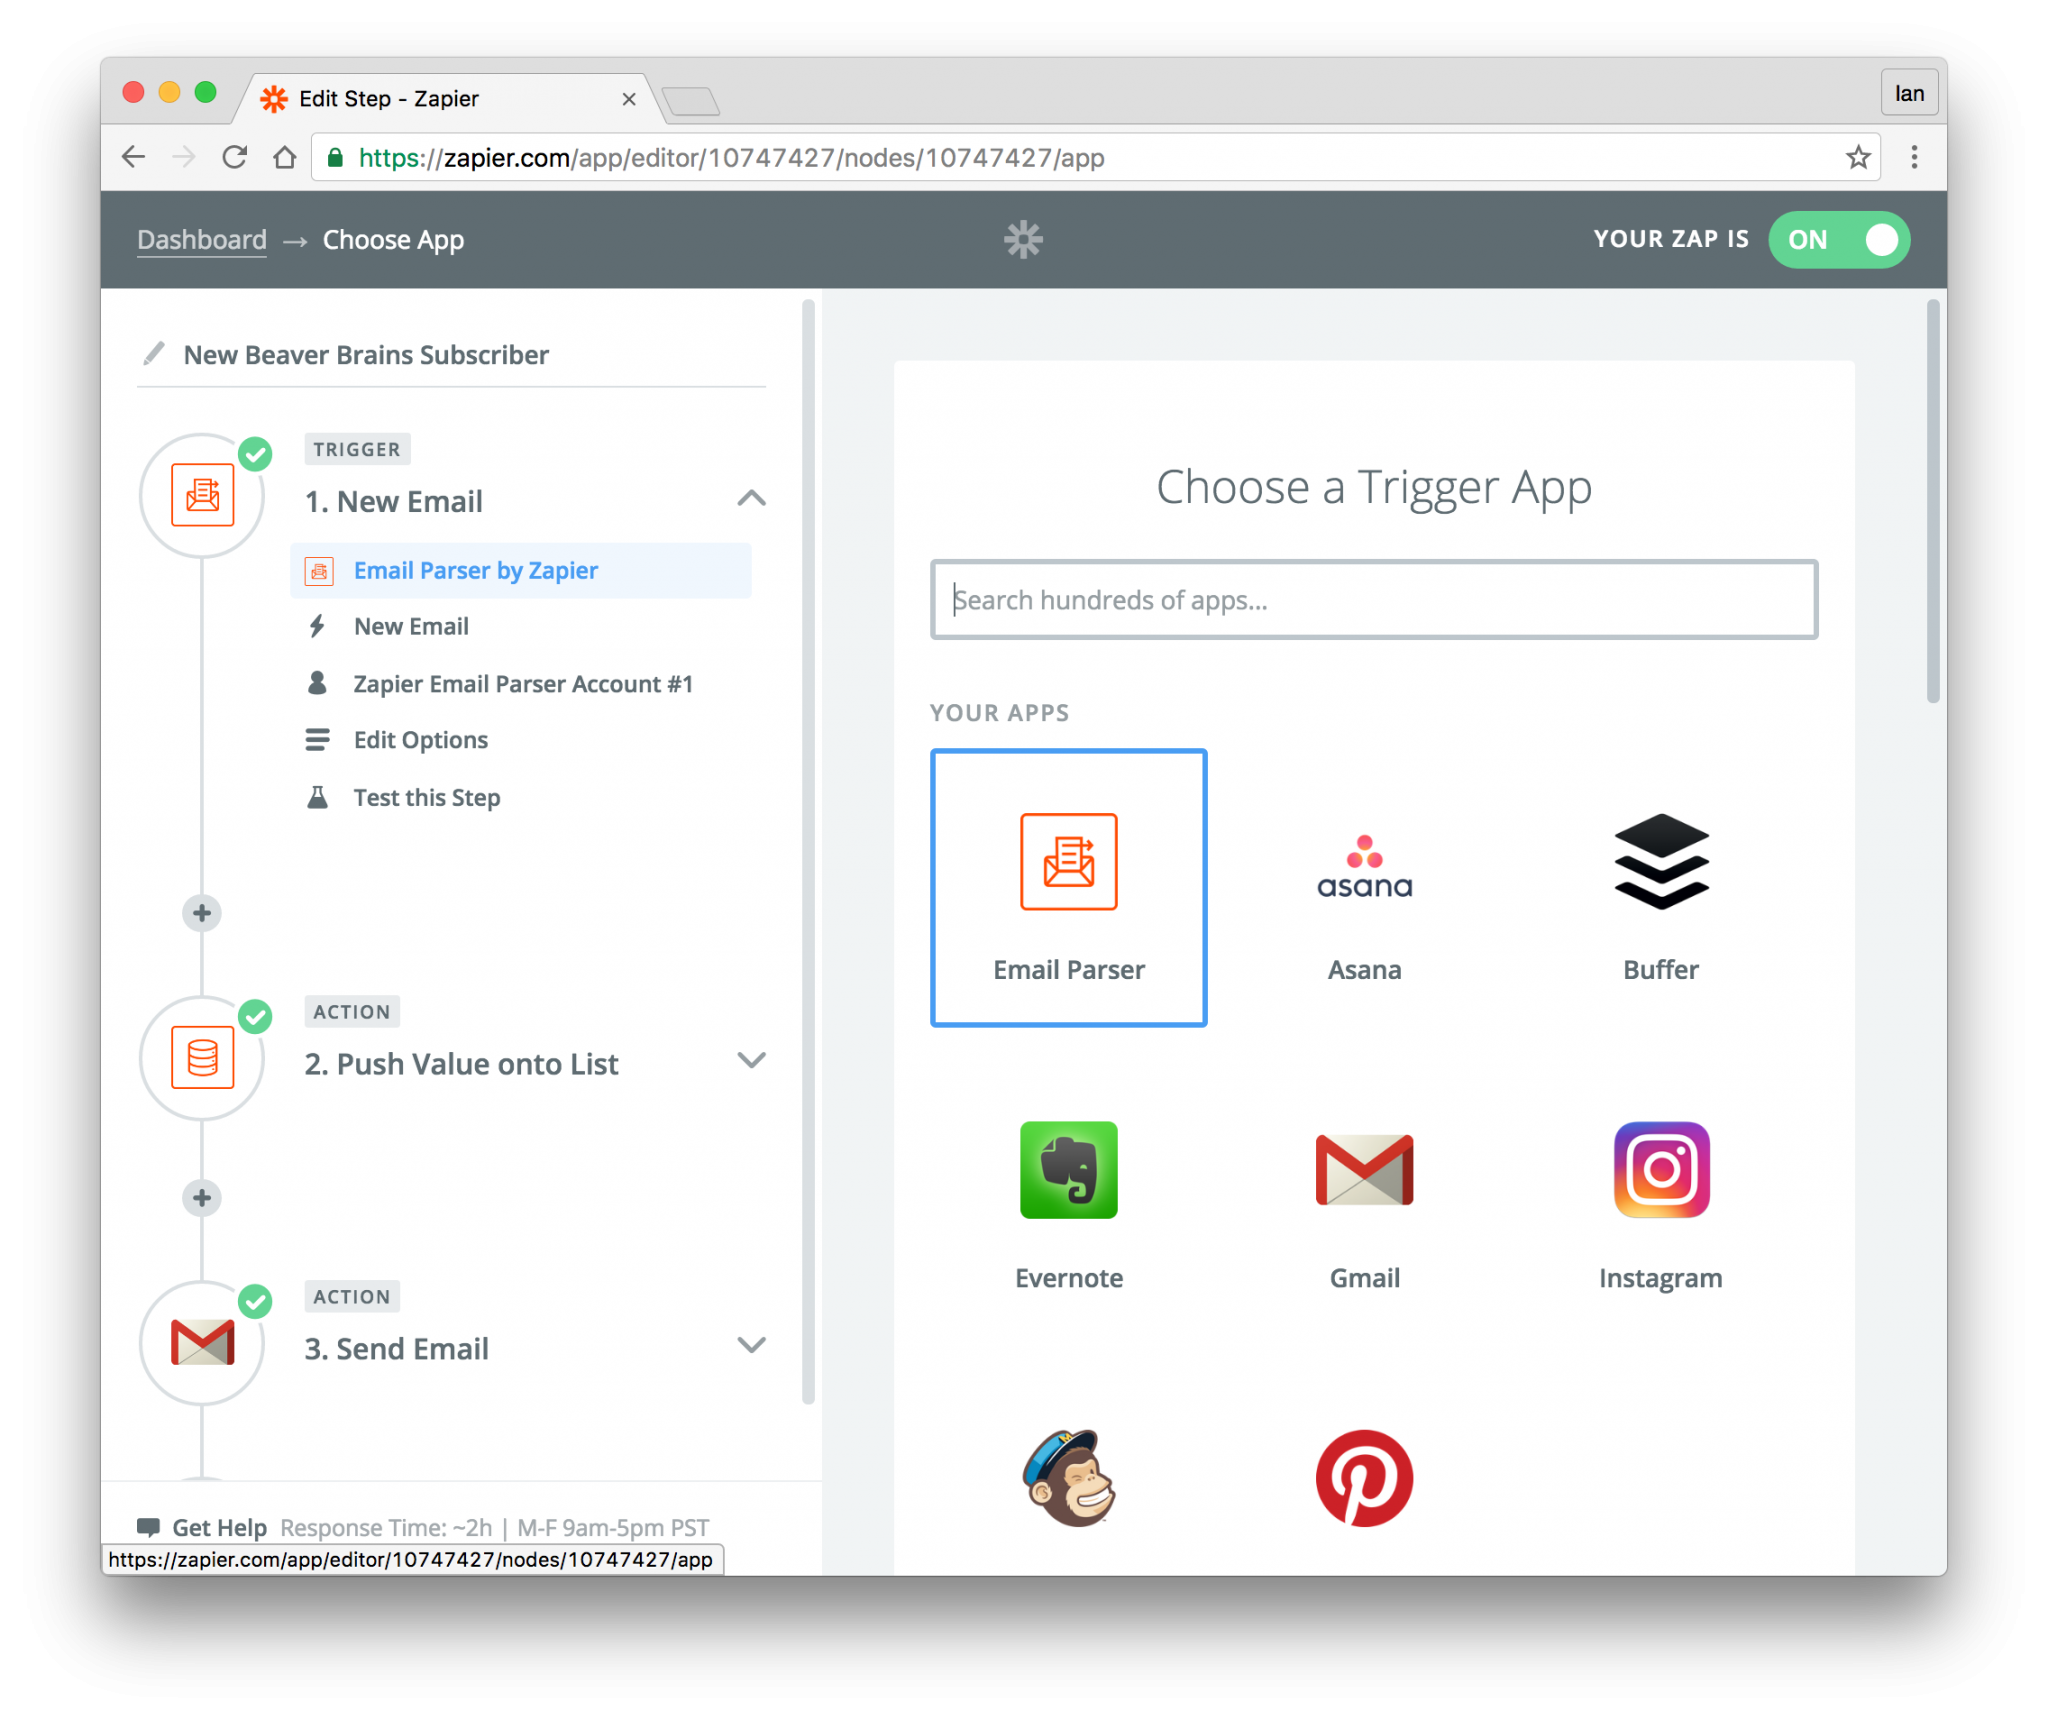
STEP 1: Set up a new Zap to trigger when the parser receives a new email from the Beaver Builder subscriber module.
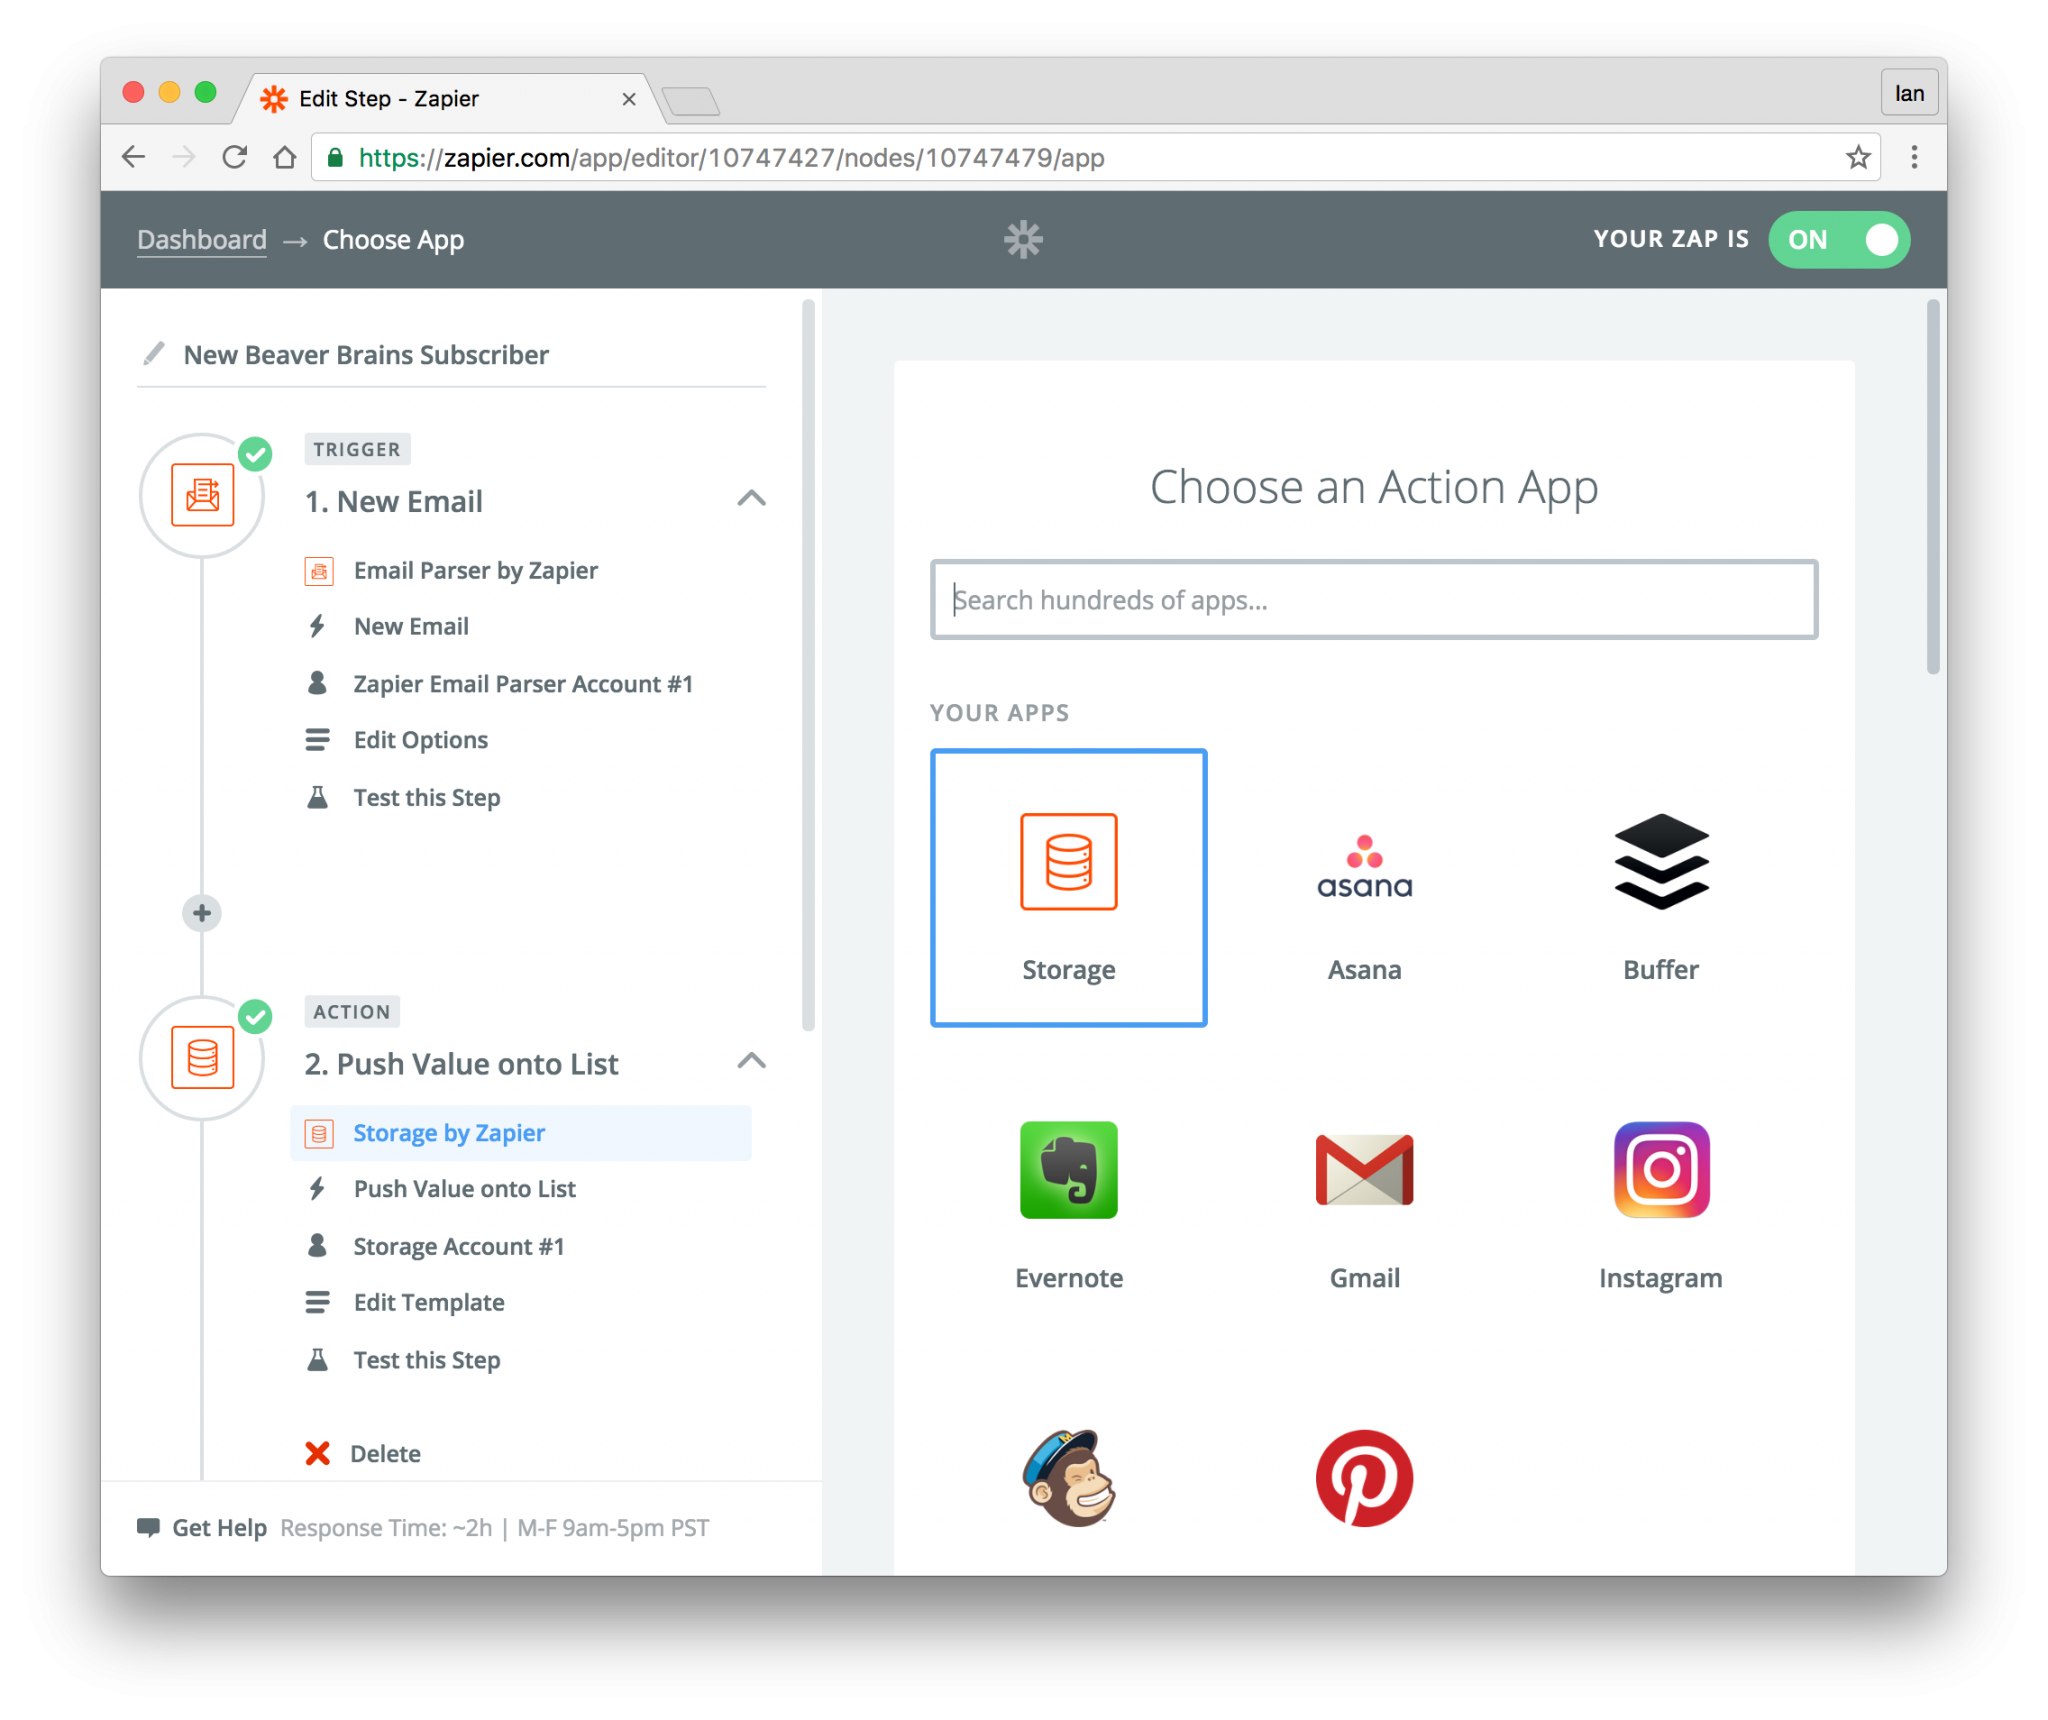
STEP 2: Save the values in Zapier storage

Setup a confirmation in your routine to send out an email and allow your user to unsubscribe too
As this is a new post notification rather than a newsletter, you’re slightly at ease when it comes to double-opt ins but it’s always good to have an Unsubscribe option in this email in case someone is up to no good.
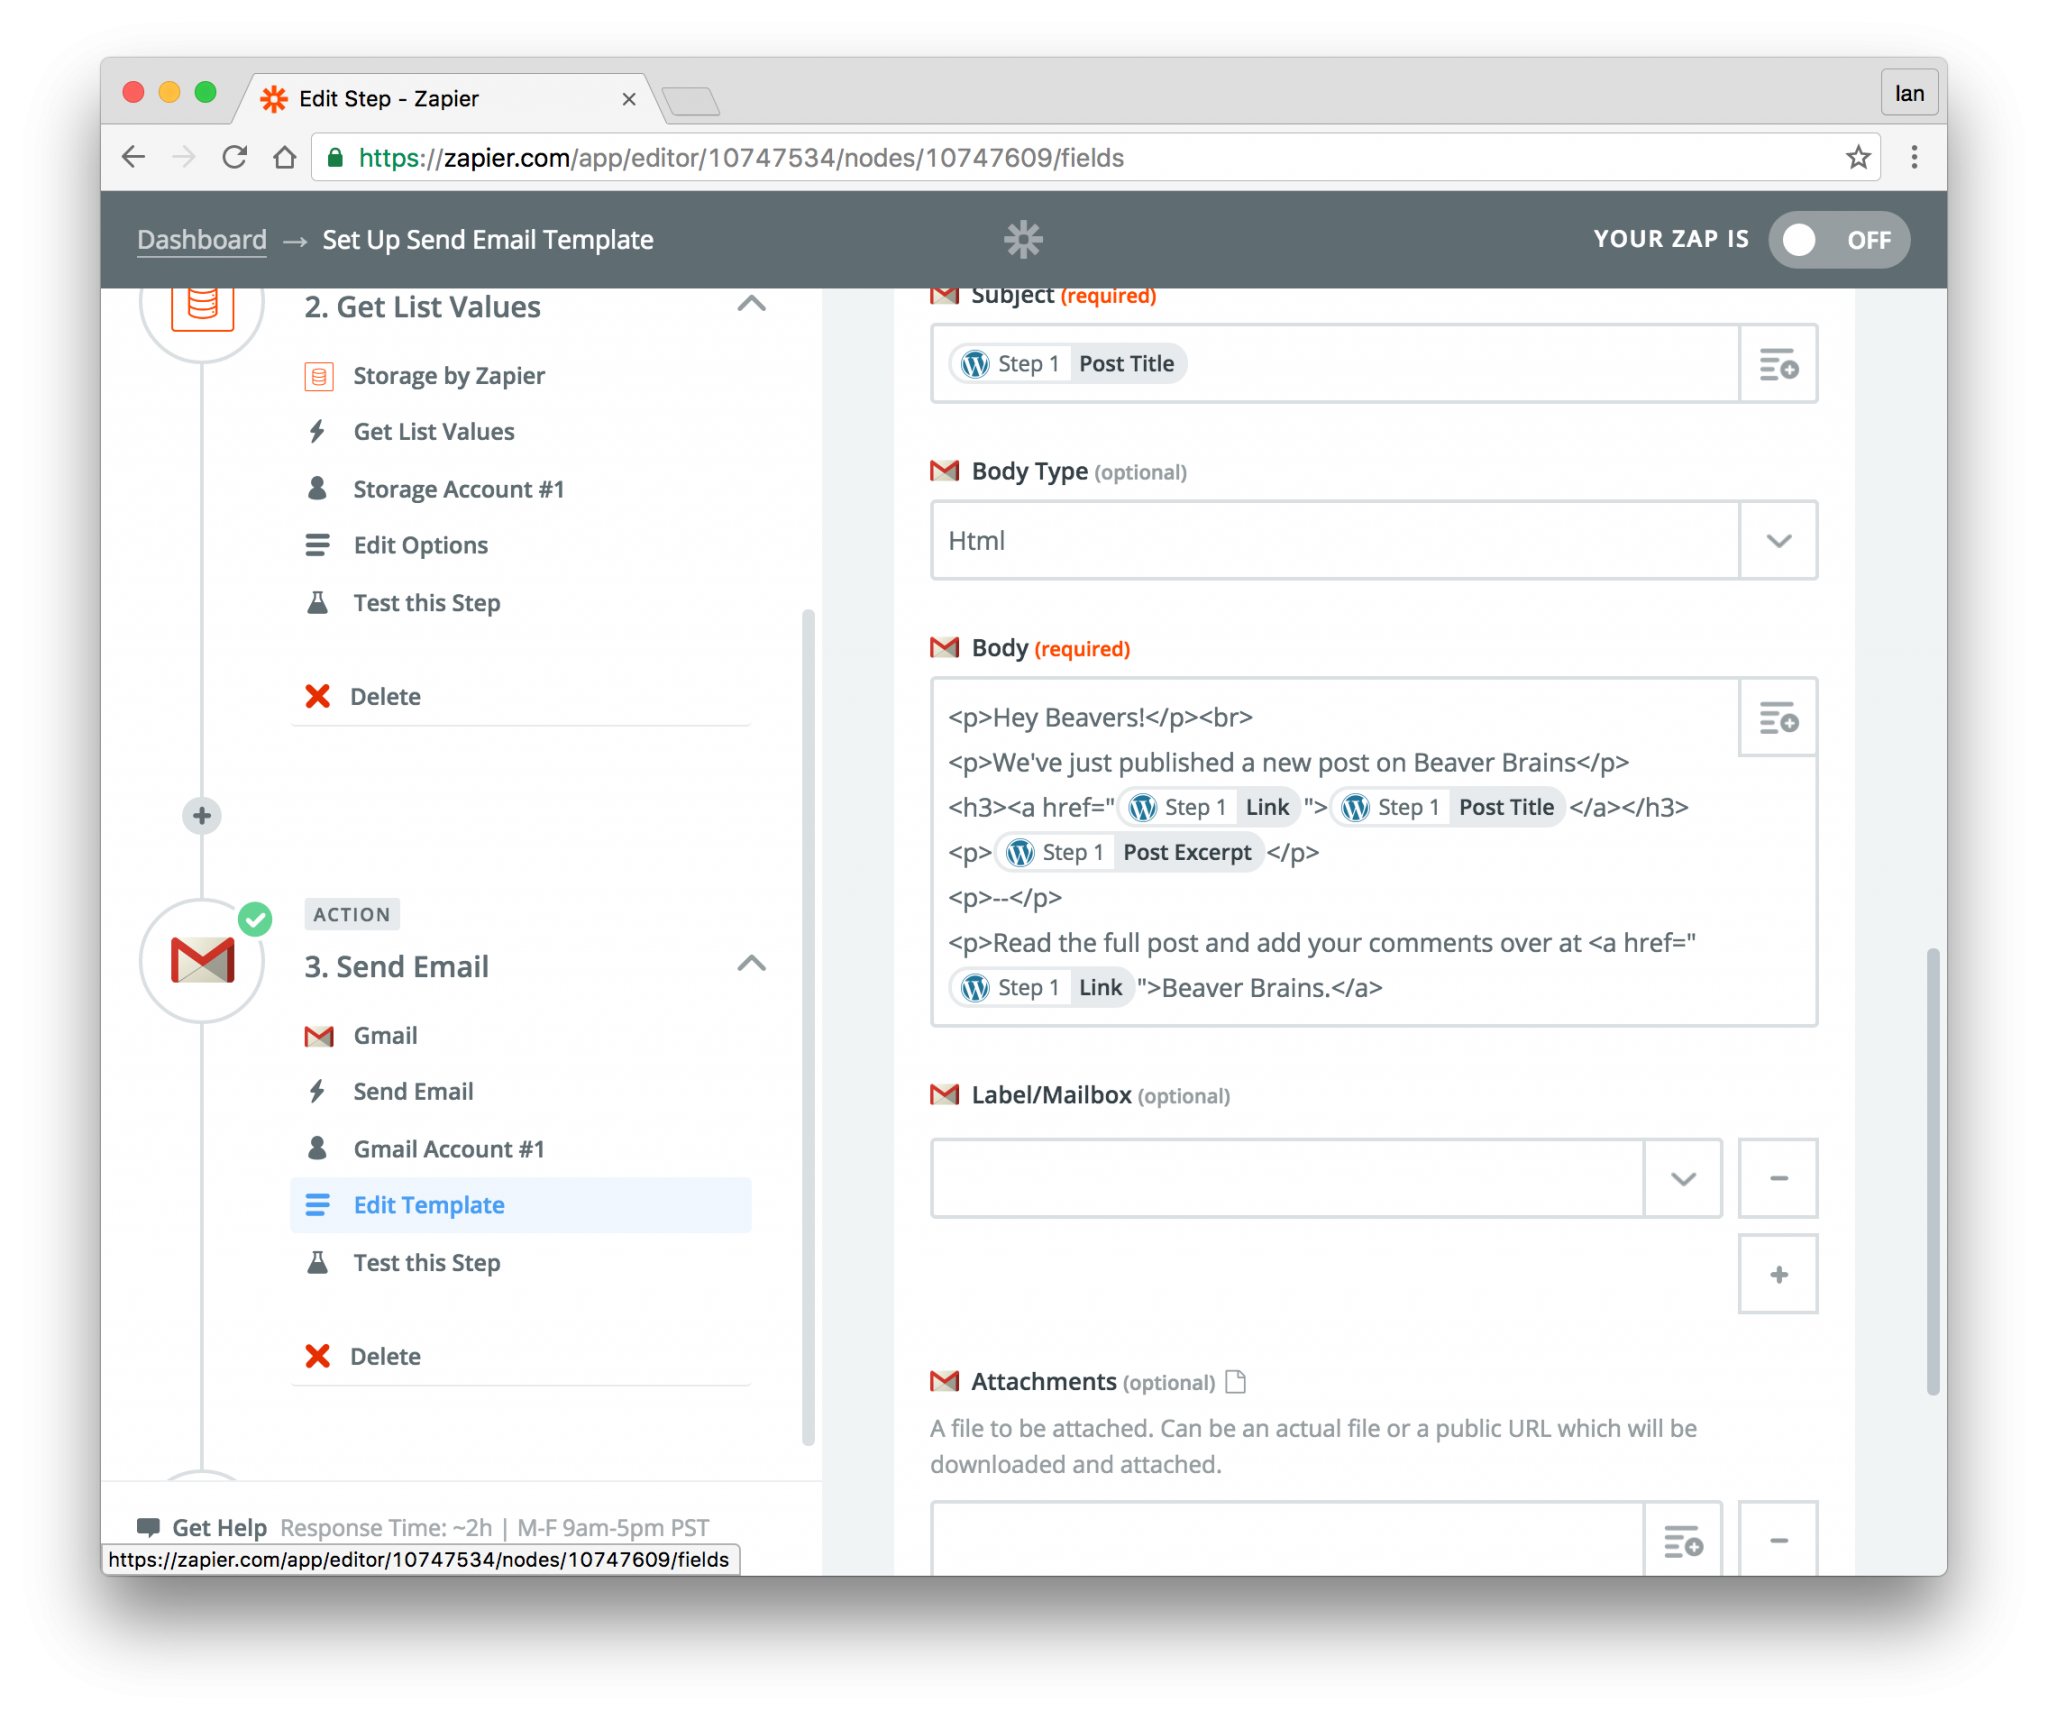
Step 4: New post trigger
Again, using Zapier, we can set up a simple new post notification to trigger whenever a new article is published on your website.
Using the Wordpress trigger along with the Zapier Storage and Email actions you can build a routine to notify your subscribers whenever you publish a new article.
We use the Wordpress app to pull out the post excerpt which we can then use to populate the email notification sent out to our subscribers.
You can add all sorts of intermediate steps into these routines if you like to be notified of new subscribers and to add new subscribers to other lists like ActiveCampaign or Mailchimp. So as a starting point it’s a great way to build up lists without having to add further plugins for each of these services.
Unsubscribe
It’s always good and necessary to allow a simple unsubscribe routine at the base of each of the emails you send out. In our follow-up post, we’ll show you how to create a form on your website that is dynamically populated by creating a URL such as https://yourdomain.com/?unsubscribe=emailaddress generated in your newsletter footer.
Using a similar routine you can then pass that information to Zapier to remove the subscriber from your list.
Conclusion
We like using this routine as it means we don’t need to add more plugins or services to our website. If you run a website with a team, be careful that each of them is aware of how this functionality is achieved otherwise you may end up with some members confused by the way your notifications work. Be mindful of your country’s regulations when it comes to privacy and collection of personal information too.
This is brilliant! I didn’t know Zapier could do this. I can definitely see value in this.
Cheers Grant – I guess, since the parser can pull out any values from your emails, you could use it for lots of things – orders / queries / contact forms / support requests etc…