How to make a full screen image or video background landing page in Beaver Builder
Beaver Builder is a great way to get a landing page built really quickly and we’re seeing beautiful child themes and templates released by the community and the Beaver Builder team, every day.
Landing page templates are cool, and beaver Builder releases some really great templates with their theme. You’ll notice that all of the templates feature great full-screen images, video or background colours, but they omit the header site logo and menu. What if you want to keep the header but retain the full-screen images or background videos? In this technique, we’re going to show you how to achieve this without additional plugins or code.
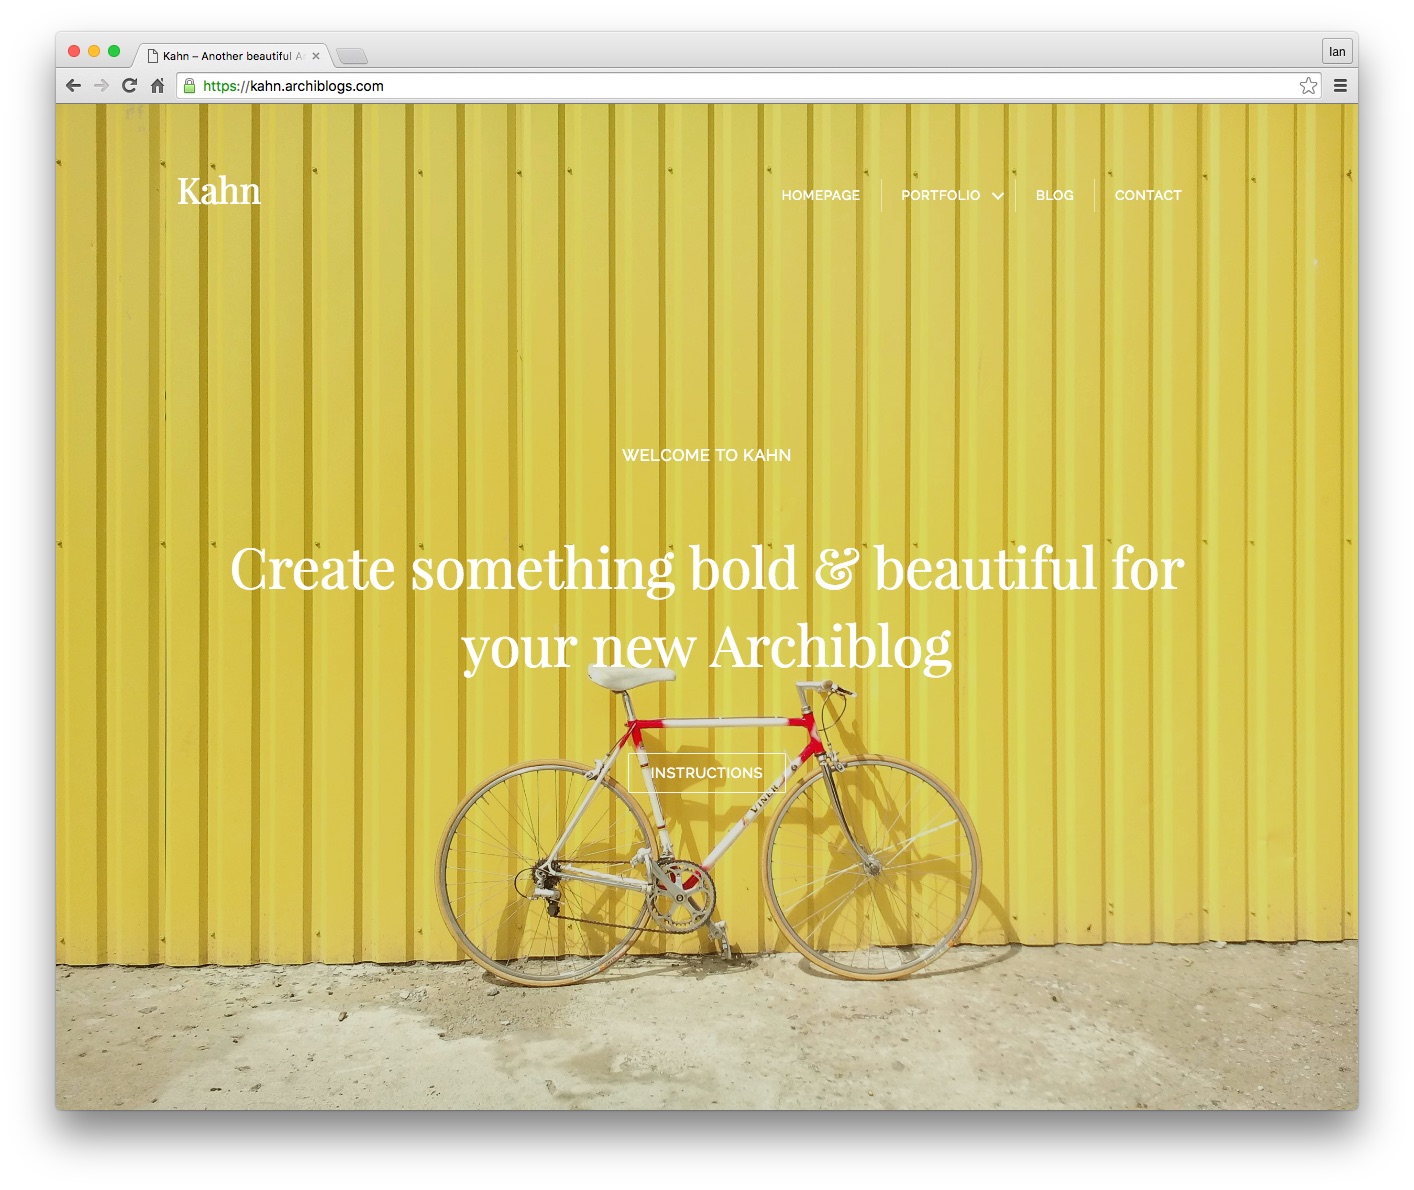
An example of the page we’re about to build
You can see how this would look in the screenshot above and by example on this page, built using this technique.
Set up a header menu
If you don’t already have a header menu set up, head over to Appearance > Menus and create your menu. Set this menu as your Header Menu. We’ll be using this menu as we progress through this tutorial.
Create a new landing page
Create a new page and open up the page builder to start editing. Add a new row to the top of the page, and set it to be full width, full height and set Content Alignment to ‘TOP’. We’ve set our row to display a slideshow of images from our media folder, but you can set this as a single image, a video or a coloured background as you prefer. Here’s a screenshot of our row settings:
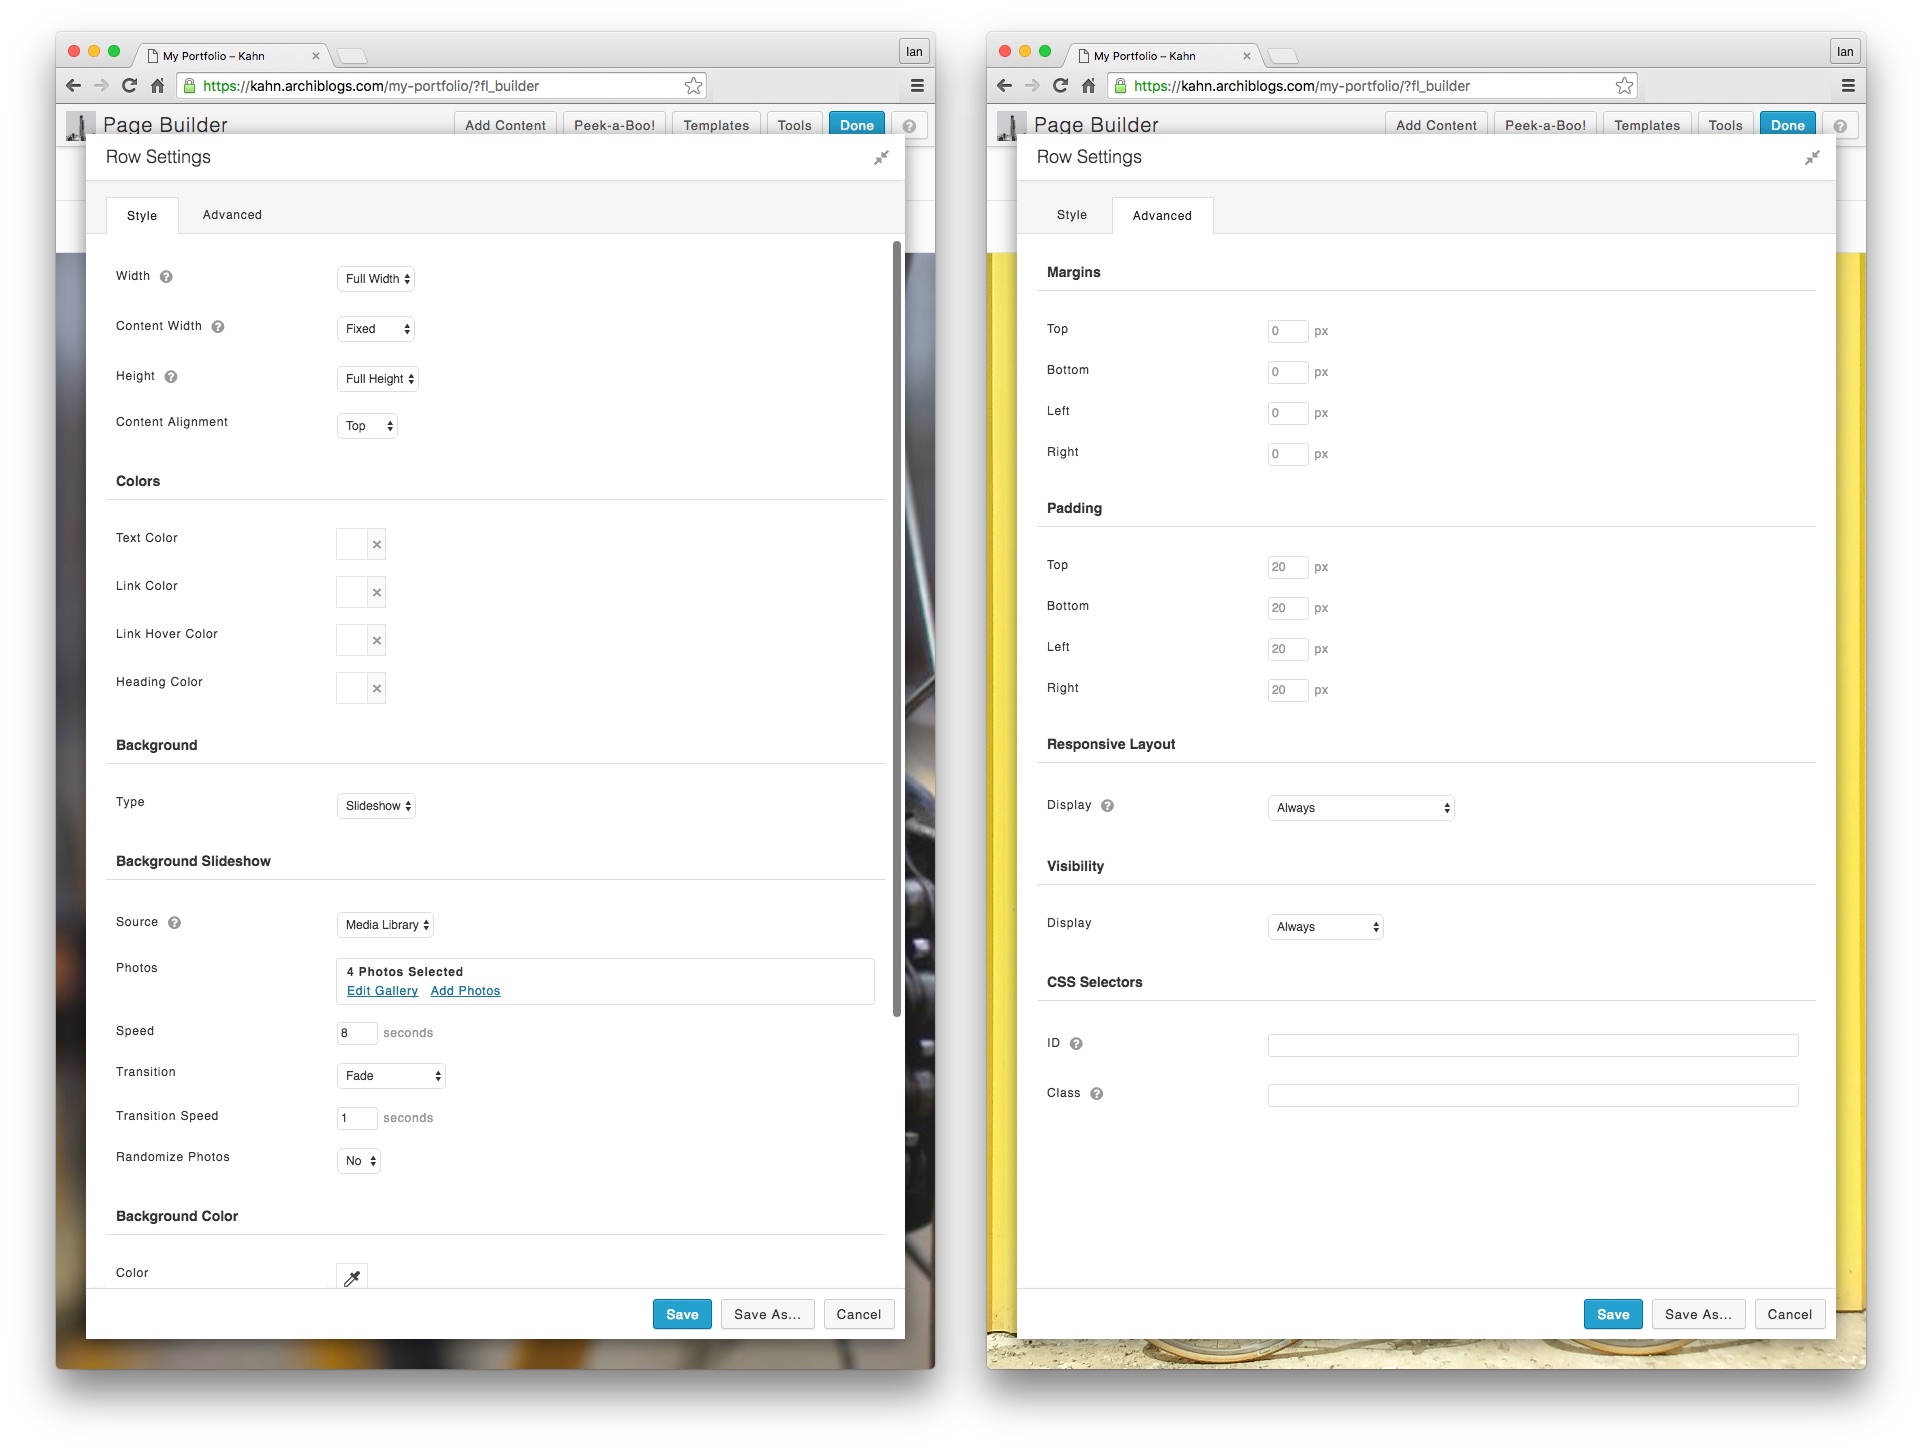
Set your Beaver Builder row settings to start building your full-height, full-width image or video background landing page.
On the advanced tab of the row settings, make sure your row margins are set to 0px. You can leave the padding settings as default so that when you scale down your viewport, the content area retains the padding on each side.
Add logo and menu
Next, we’re going to add a 2 column row and add our logo and menu to each adjacent section. Drag the 2 column row from the modules list and set the column widths so that the logo and menu have enough space in each of their columns. We’ve set ours at 30 / 70.
For the logo, add either a text or a photo module and set the module preferences as you need. We’ve added a text module as our logo which matches the choice we made in the Customiser > Header > Header Logo settings.
![]()
For the menu on the right, add a Menu module and set the preferences to suit your layout. To match the layout we created, set the menu module preferences as follows:
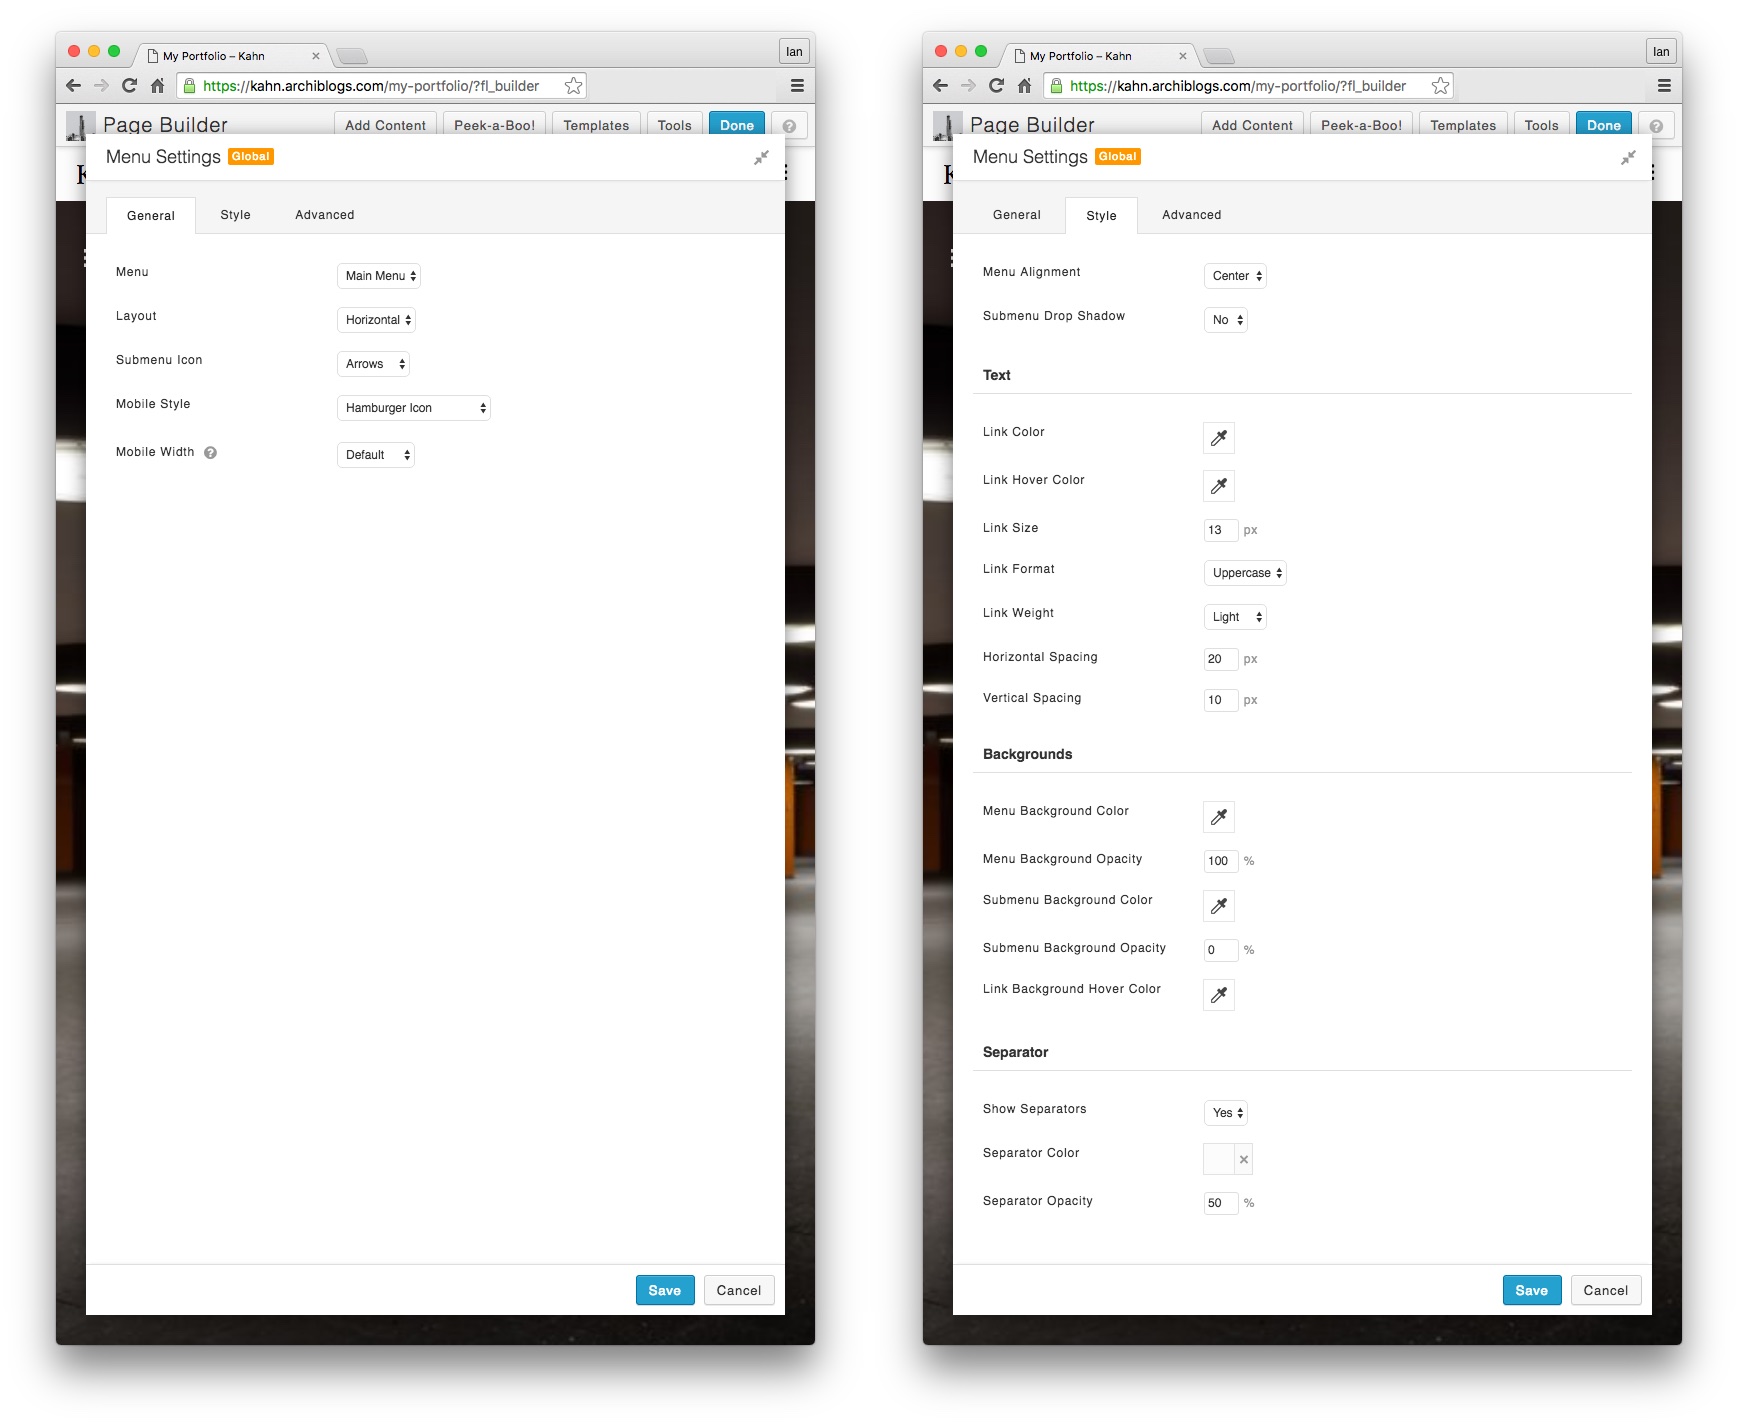
Change your Beaver Builder module settings to match these
For both the logo and menu, we have set the display options in the advanced tab so that each of these elements only displays on large devices. For mobiles and smaller screens, these elements will clash with the Beaver Builder mobile header settings so it’s best only to show our new logo and menu on larger screens. After all, that’s where we want the full-screen screen design to really shine.
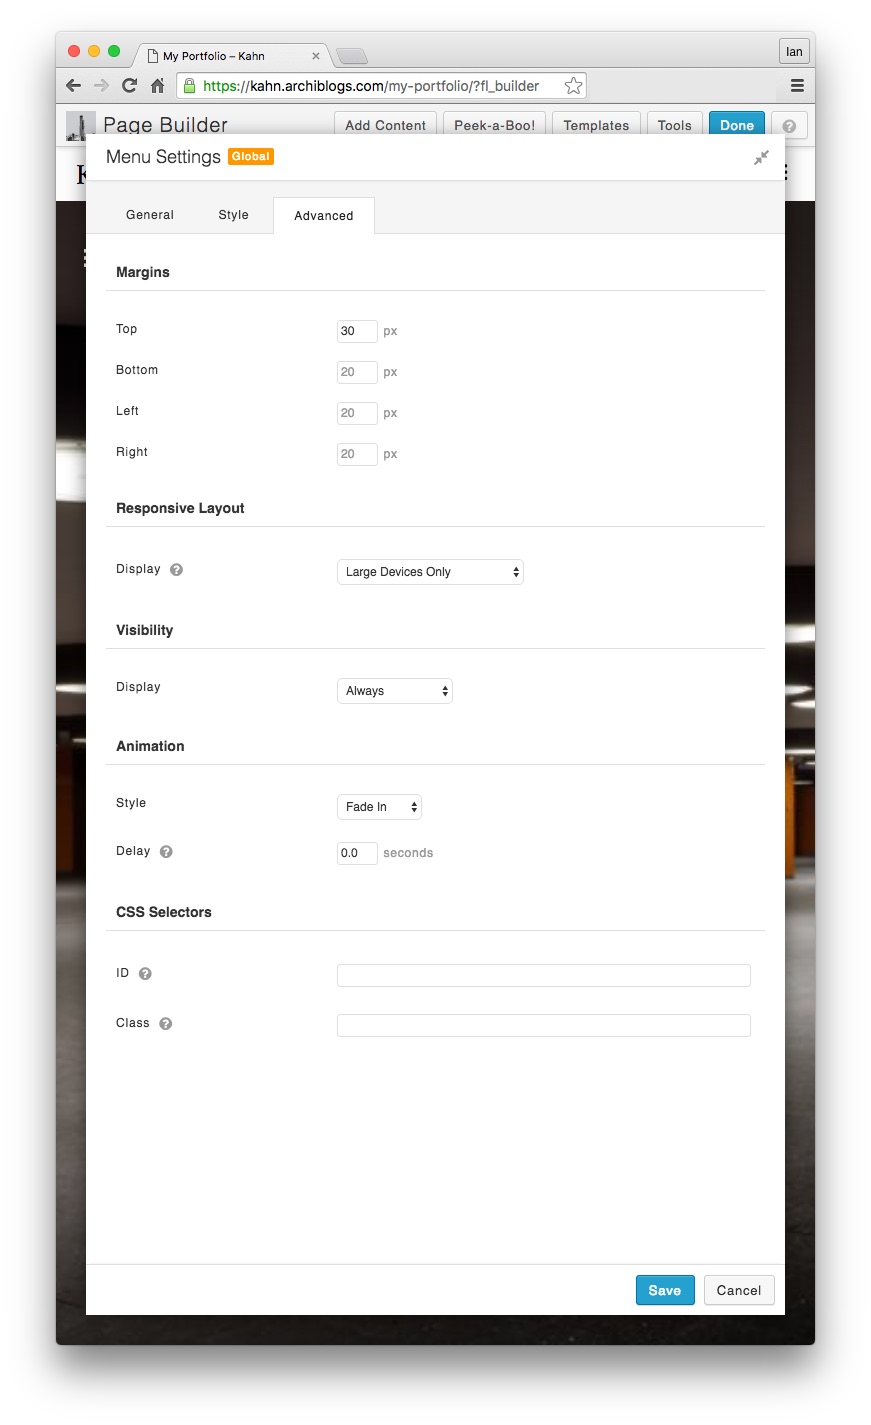
Set your menu to display only on large devices
For the last step, we’re going to head over to the customer and set the preferences for our header. Head to Customiser > Header > Header Layout and set the ‘Fixed Header’ to Disabled and set ‘Hide Header Until Scroll’ to Enabled. For scroll distance, play around with the setting until you find a good balance between our new elements and the header menu alternating between each other on scroll.
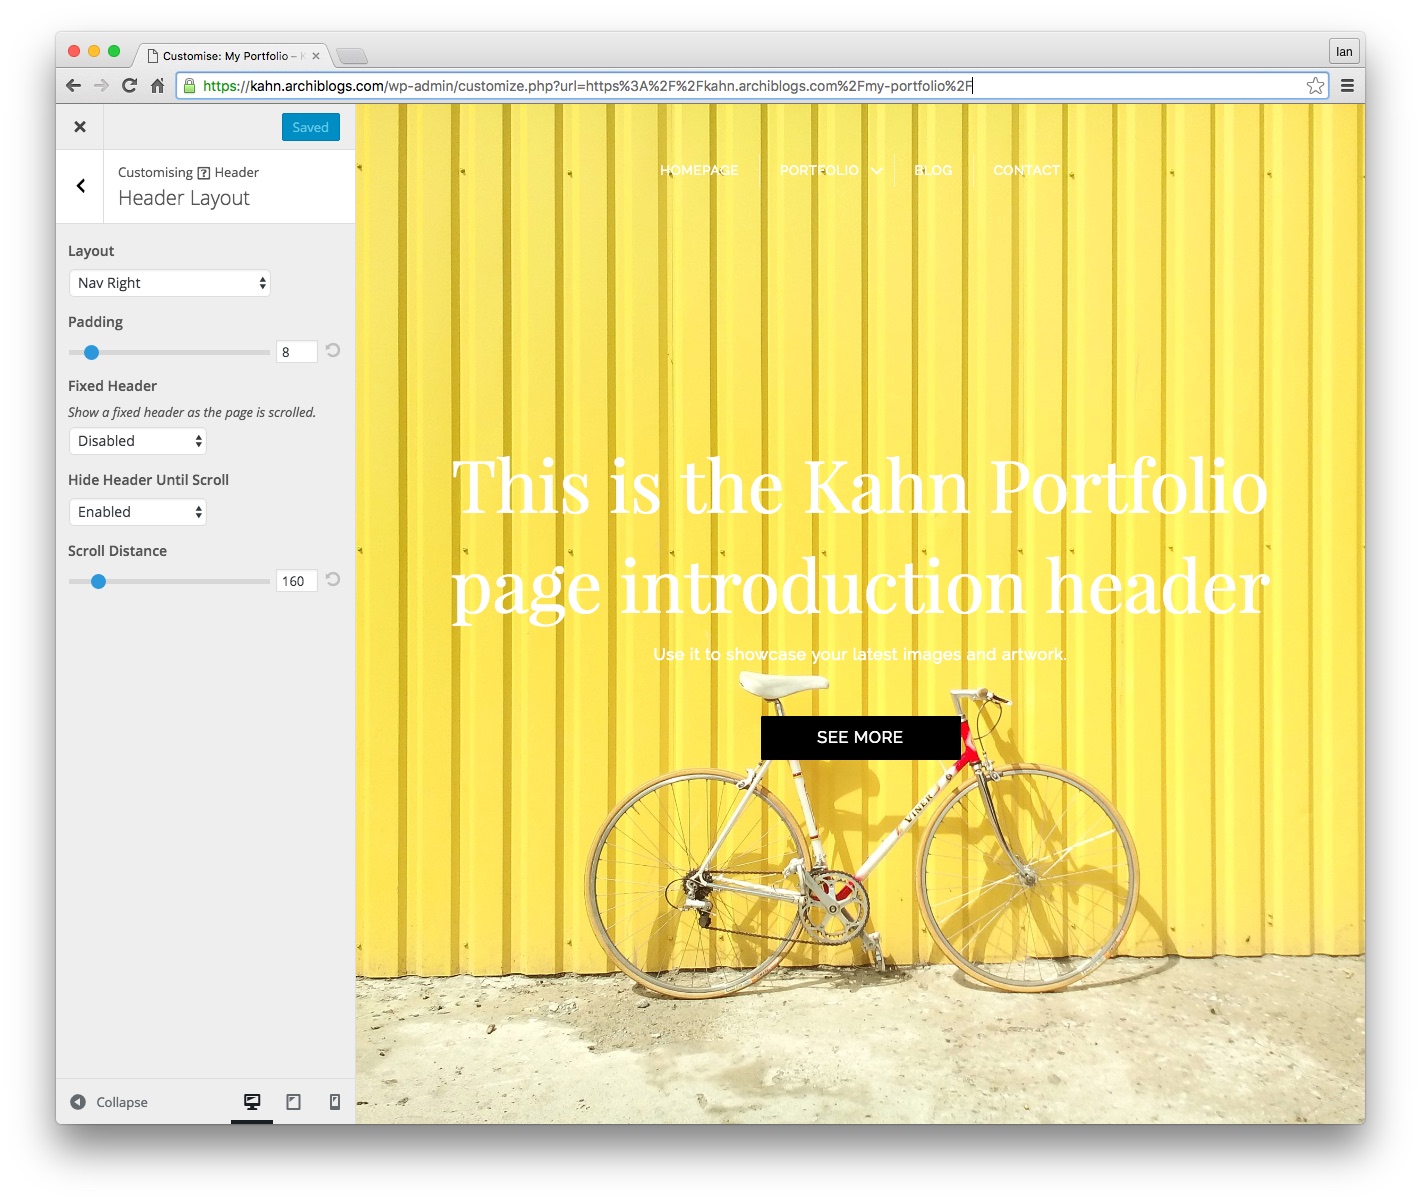
Beaver Builder Header layout settings
That’s it. You can add other elements as you like to the page and save it as a template if you plan to use the layout on multiple pages.
J7Digital have a neat plugin to handle complete replacements for both your header and footer. Check it out here. Also, as Peter Luit mentions in the comments below, he’s experimenting with these concepts in more detail here – > Go check it out.
If you’d like Beaver Builder to have this feature built in, why not vote for it here?
This is great, thank you! I love the screenshots of the settings. Very brainy, indeed. 🙂
Thanks, Andrea – beats having to type it all out! 🙂
Then it was even brainier than I thought! 🙂 You’re welcome, Ian. I love your tuts; please keep them coming!
Nice idea, without a line of code, well thought of…. However I do see two (little) disadvantages:
• menu is not sticky, today a standard…….
• the method has to be repeated for every page
Also have a look at this possible solution: http://beaverchildthemes.com/create-a-beaver-builder-transparent-header/
Peter
Hey Peter – check out the example page here https://kahn.archiblogs.com/ – the menu does appear as you scroll. But yes, you would need to template the header and add it to every page, so this is more a solution for landing pages. I’ll add that link to the tutorial as an alternative.
Thanks Ian, I already ‘went over’ to the other methode. Also some disadvantages there:
• because of background images in the row, images do not react responsively (might be prevented, by not using images in the background, but within a slider module
• not sticky (yet), that might be solved wit a bit CSS also
Kind Regards,
Peter
Going to have to wait for BB to make this built in I guess!? https://wpbeaverbuilder.uservoice.com/forums/270594-general/
Hi Ian,
It might be nice to add http://www.nieuwsmarkt.nl/blog/2016/07/14/making-the-bridge-theme-in-beaverbuilder/ to your article, which combines your solution with teh one in http://beaverchildthemes.com/create-a-beaver-builder-transparent-header/
Kind Regards,
Peter
Thanks Peter – It’s a great experiment you’re doing and I’ve added a note in the article…